Posted by Henri Pereira on 2nd May 2016
How to build a Dutch Bucket plant grow area for your Aquaponics System
A few months ago we decided to build a dutch bucket system and attach it to an existing DWC recirculating system. We had some spare space, so it made sense to use up the excess nitrates being produced by the existing system.
Of course, you can also build a stand-alone dutch bucket system, but then you will have to take into account that there is adequate filtration to prevent blocking the feeder drip system. Ideally, a Dutch bucket system lends itself to hydroponics, but can definitely also be used in aquaponics as we are about to show you.
What you require
1 x Submersible pump (i.e. 400 litres at 1 meter head)
4-6 x Plastic Buckets with lid ( 5 or 10 litres)
8-12 x 50mm net pots
40-60 litres grow media (stone, hydroball or cocopeat)
1 sqm fine mosquito net (filter for bottom of buckets)
4-6 x Drippers
2m dripper irrigation tube
4-6 x irrigation tube T-junction
3-4m x 15mm irrigation pipe
8-12 x Full Flow 90 degree bends (15 mm)
1 x 50mm hole saw
Drill Machine
Basic Explanation
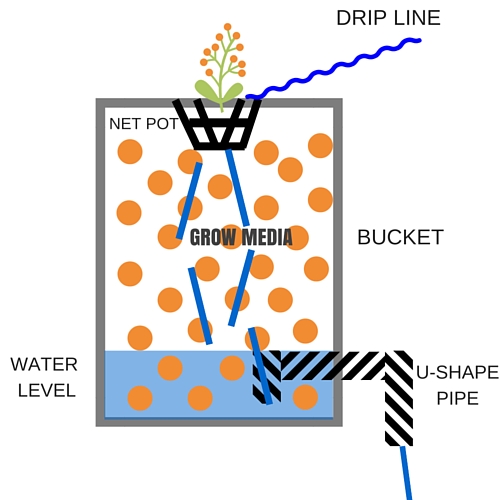
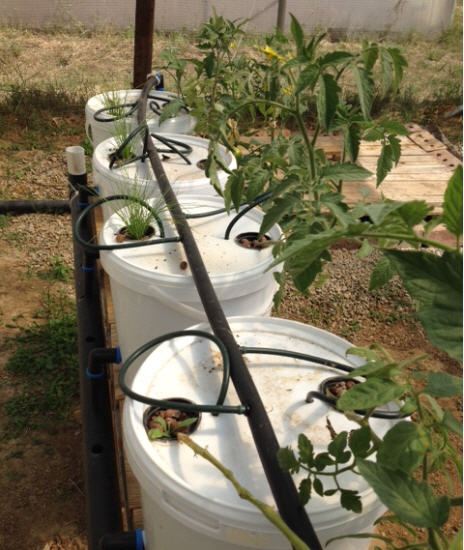
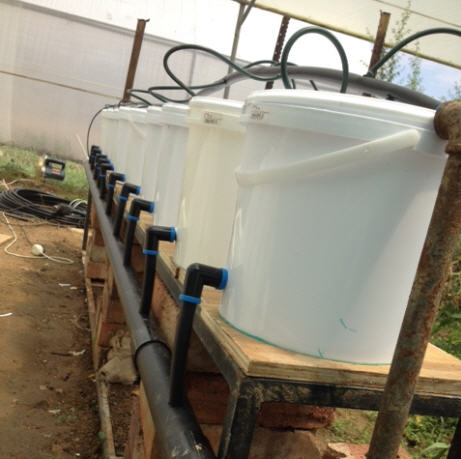
A U-bend is attached at the bottom of the bucket as illustrated. Ensure that the bottom of the U-bend on the inside of the bucket is 5-10 mm above the bottom of the bucket.
The U-Bend pipe at the bottom of the Dutch Bucket ensures that the water level in the bucket does not exceed the horizontal section of the U-bend.
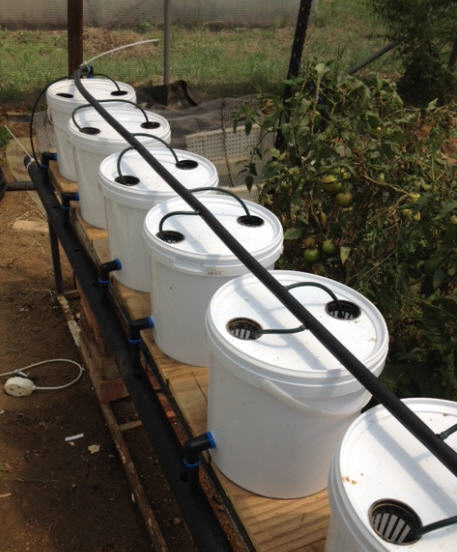
Fine netting should be placed over the U-Bend shaped pipe to prevent the grow media from blocking the water outlet. Grow media is then added all the way to the top of the bucket. Drill 2 x 50mm holes on bucket's lid for insertion of 50mm net pots. Close the top of bucket with the lid and add water feed drip tubes to each net-pot.
Water drips through the feeder tubes directly to the root of the plant ensuring hydration at all times. It then trickles through the grow media to the bottom of the bucket. Once the level of the water reaches the horizontal section of the U-bend it starts flowing out of the bucket.
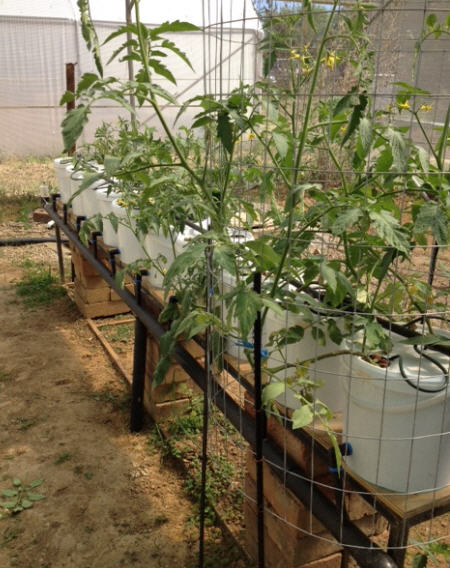
Plant roots eventually start growing around the grow media as the tap root goes deeper looking for more water. The same happens with the lateral roots of the plant. The Dutch bucket system ensures therefore that the plant roots always have a constant supply of hydration and oxygen.
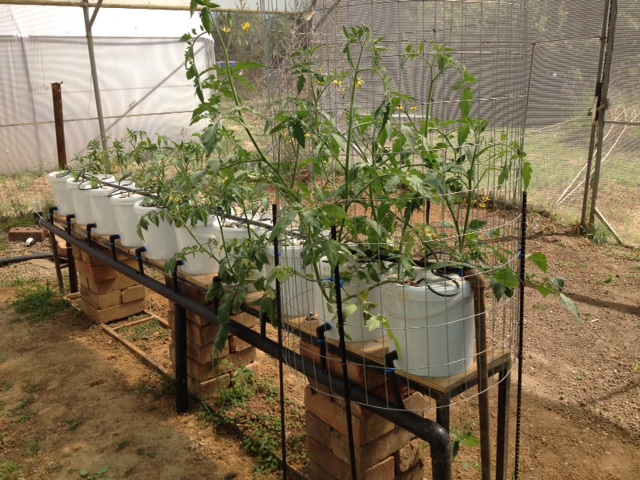
Water is thus pumped from the fishtank by a submersible pump, through the drippers, through the grow media in the buckets and then gravity fed back to the fishtank, completing the circulation cycle.
Though the grow media in the dutch buckets will act as a good bio-filter, additional bio filtration may be required in larger systems. In addition, there is also a requirement for filtration to prevent fish waste and uneaten fish food from blocking the feeder drip lines. In aquaponics, the dutch bucket system should preferably be used as an add-on plant growing area for an existing flood-and-drain or Deep Water Culture aquaponics system, so as to avoid the need for the above-mentioned filtration.
In our set-up below we made sure that the submersible pump feeding the drip tubes in the dutch bucket system is situated just below the water level in the fish tank so as to prevent suction of grit, fish faeces and uneaten fish food lying at the bottom of the fish tank.
You need to check daily check on each drip line to ensure good flow. If one of the drip lines is blocked, unblock it immediately to ensure that the plant receives the necessary hydration and nutrients.
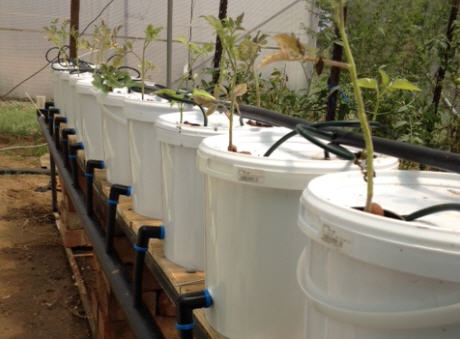
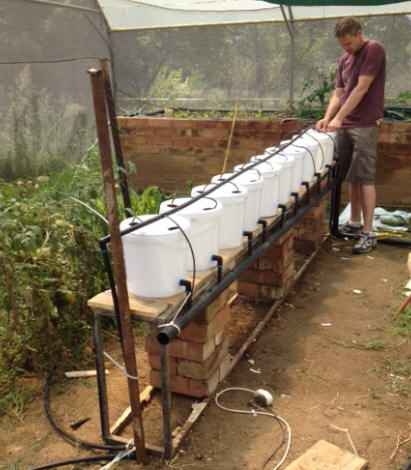
Building Starts

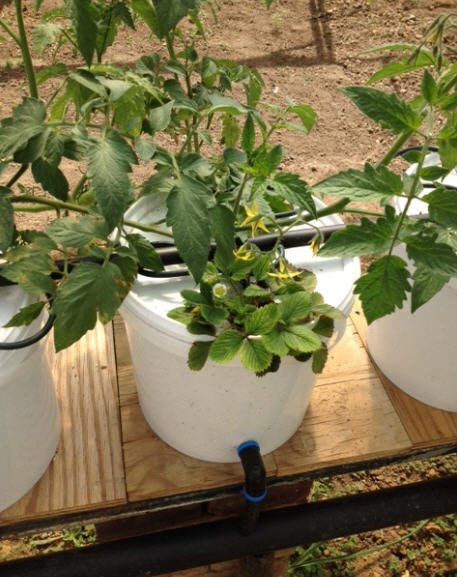
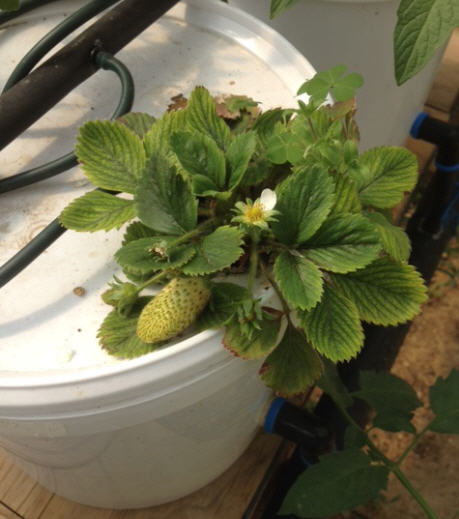
Seedlings Added
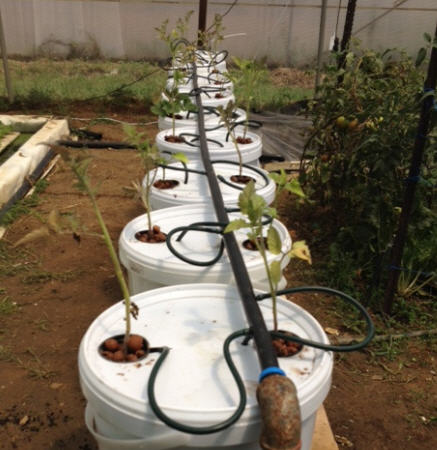

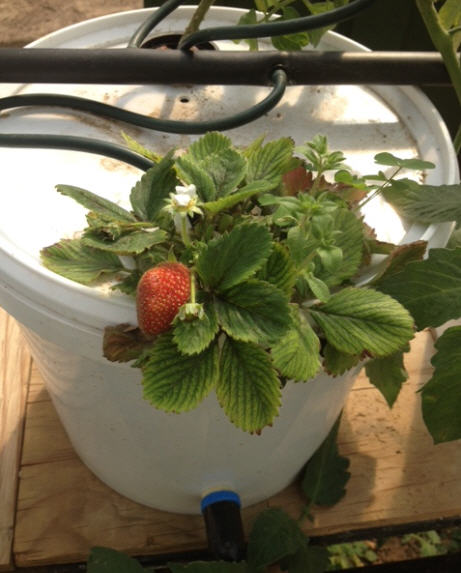
Several Weeks Later