

Posted by KP on 21st Dec 2020
HOW TO GROW MICROGREENS THE EASY WAY - SOUTH AFRICA
What are Microgreens?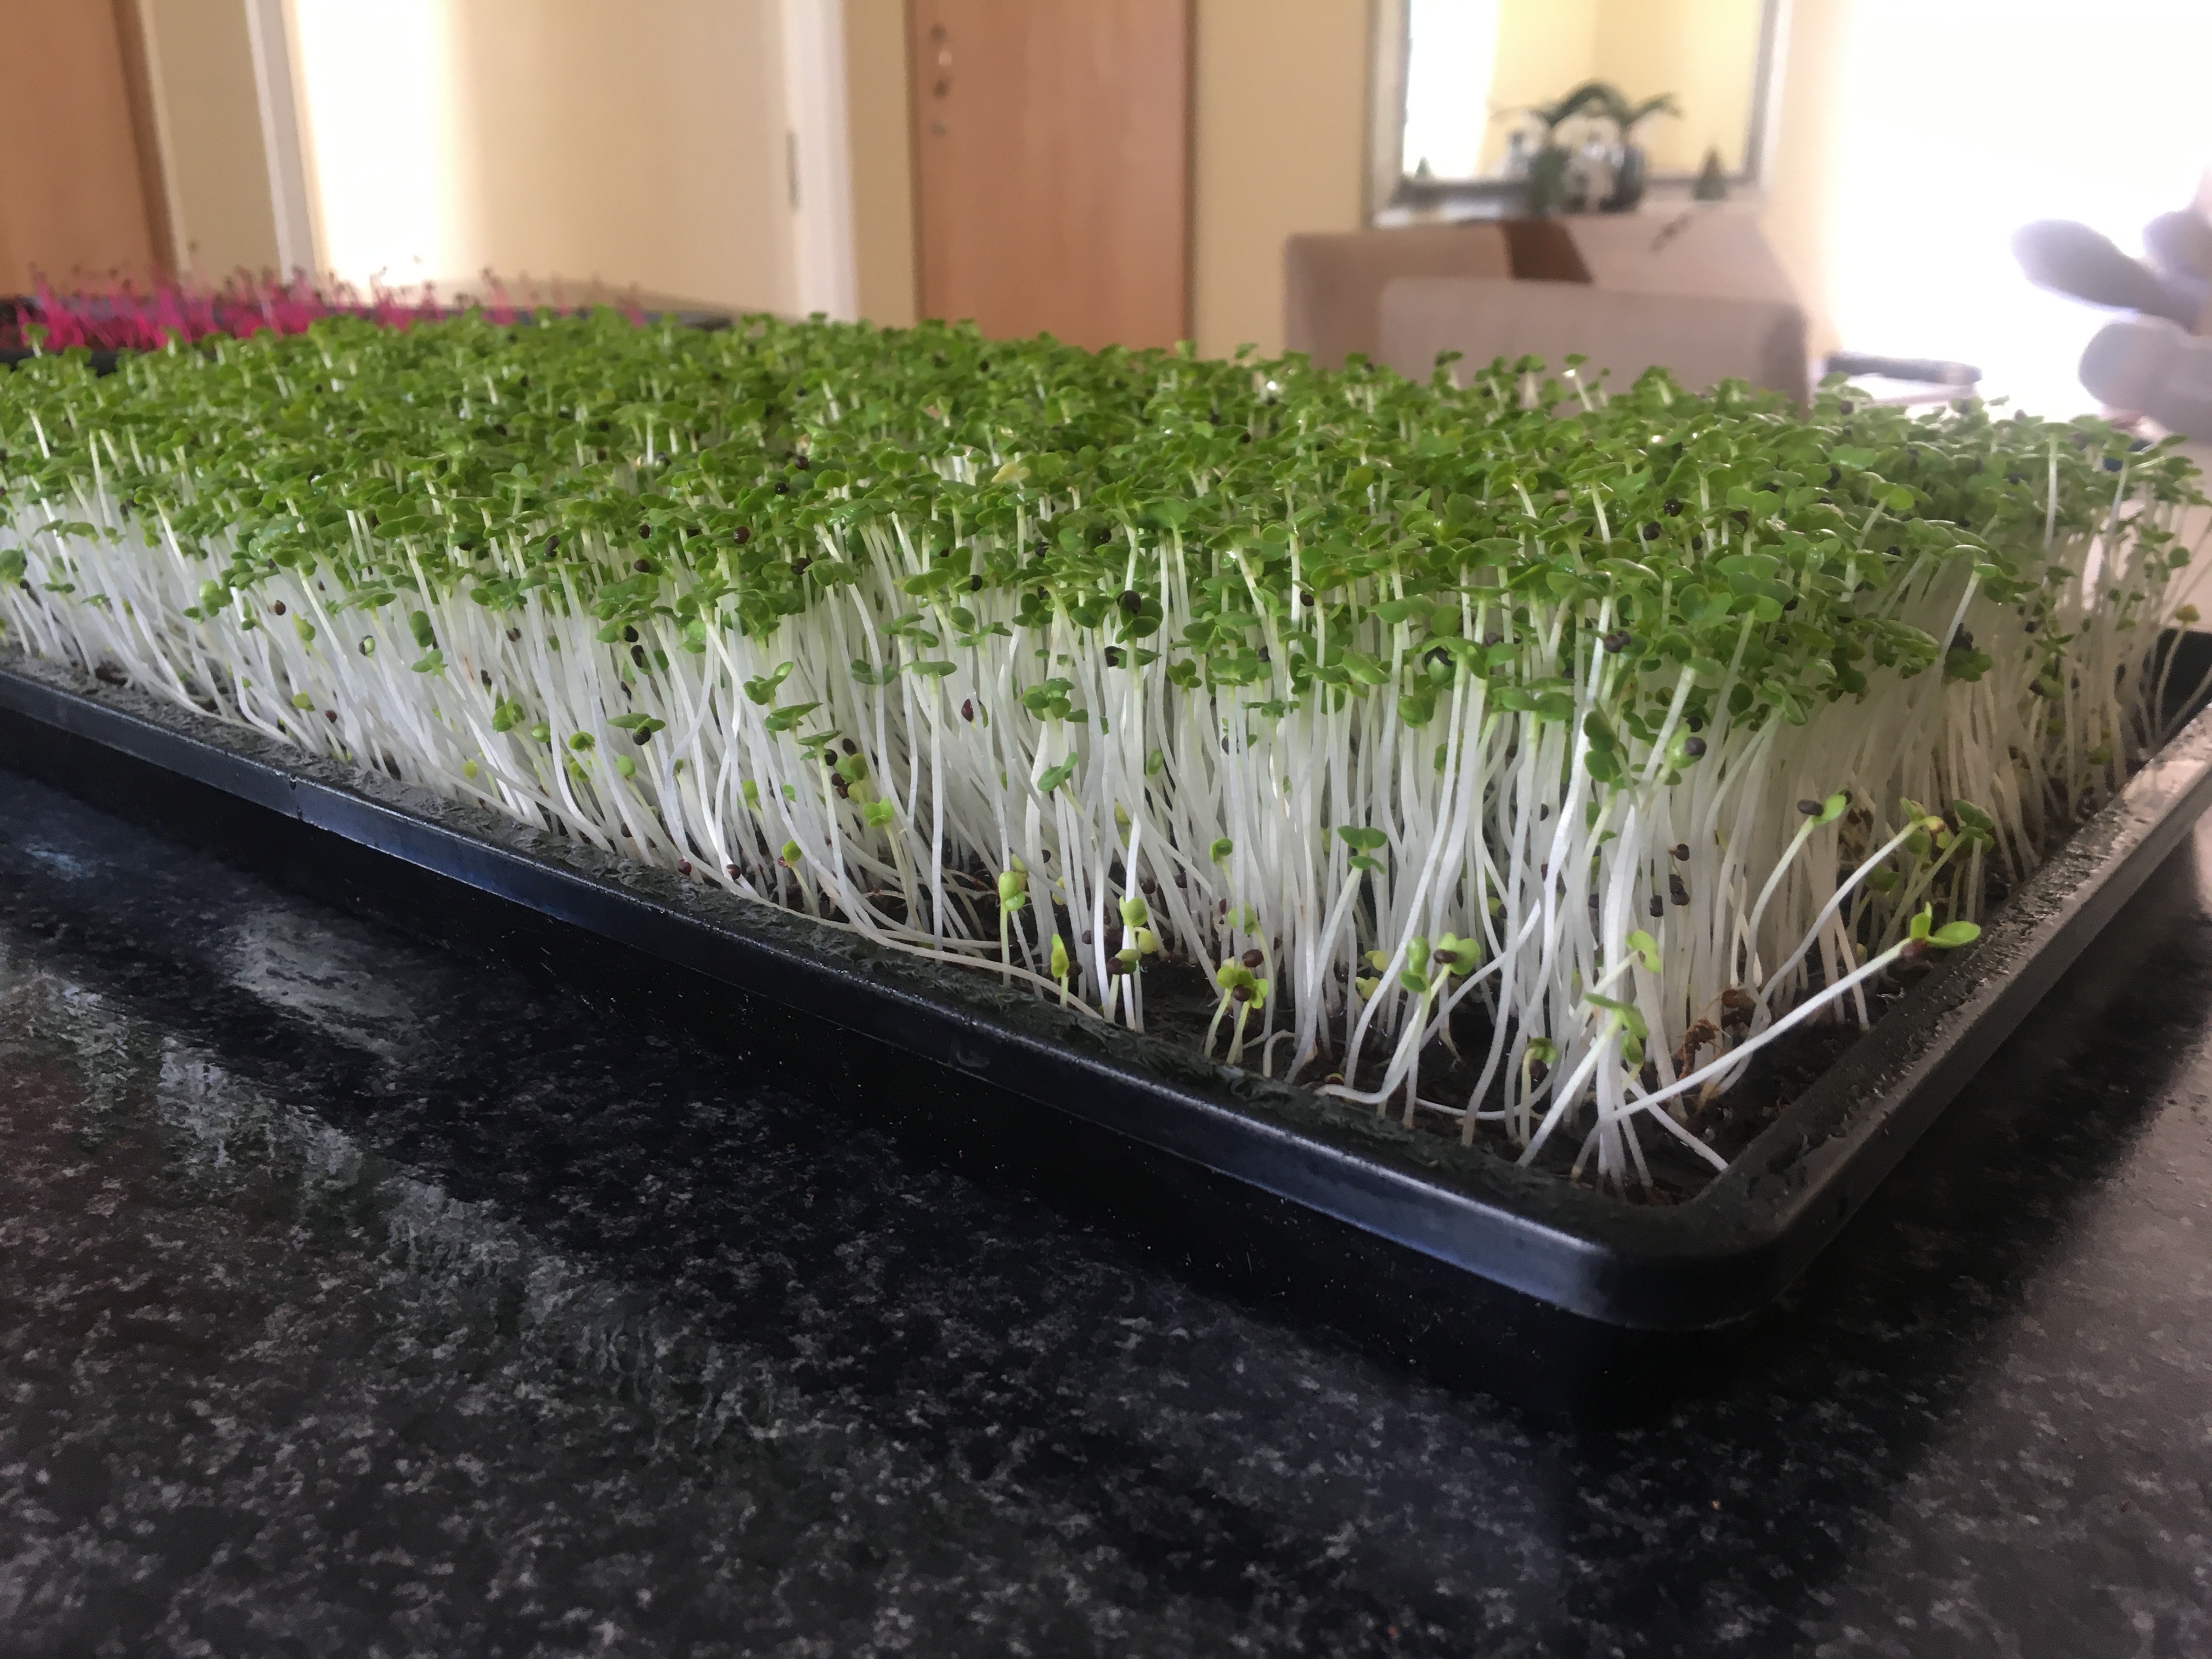
Simply put, microgreens are baby shoots of edible plants such as lettuce, beetroot, sunflower, rocket, basil, turnip, carrots, etc, that are grown in shallow microgreens trays and then harvested within 7-14 days. Microgreens are packed with nutrition and vitamins, and bursting with intense flavours. For example, a beetroot microgreen, tastes just like beetroot.
Who uses Microgreens and where?
Many vegetarians and people who prefer a plant based diet, grow or buy microgreens for own consumption. Restaurants however are the biggest consumers of microgreens. They use it in salads and as a garnish for certain of their dishes. Microgreens are also making thieir way into juicing or smoothie drinks in health shops.
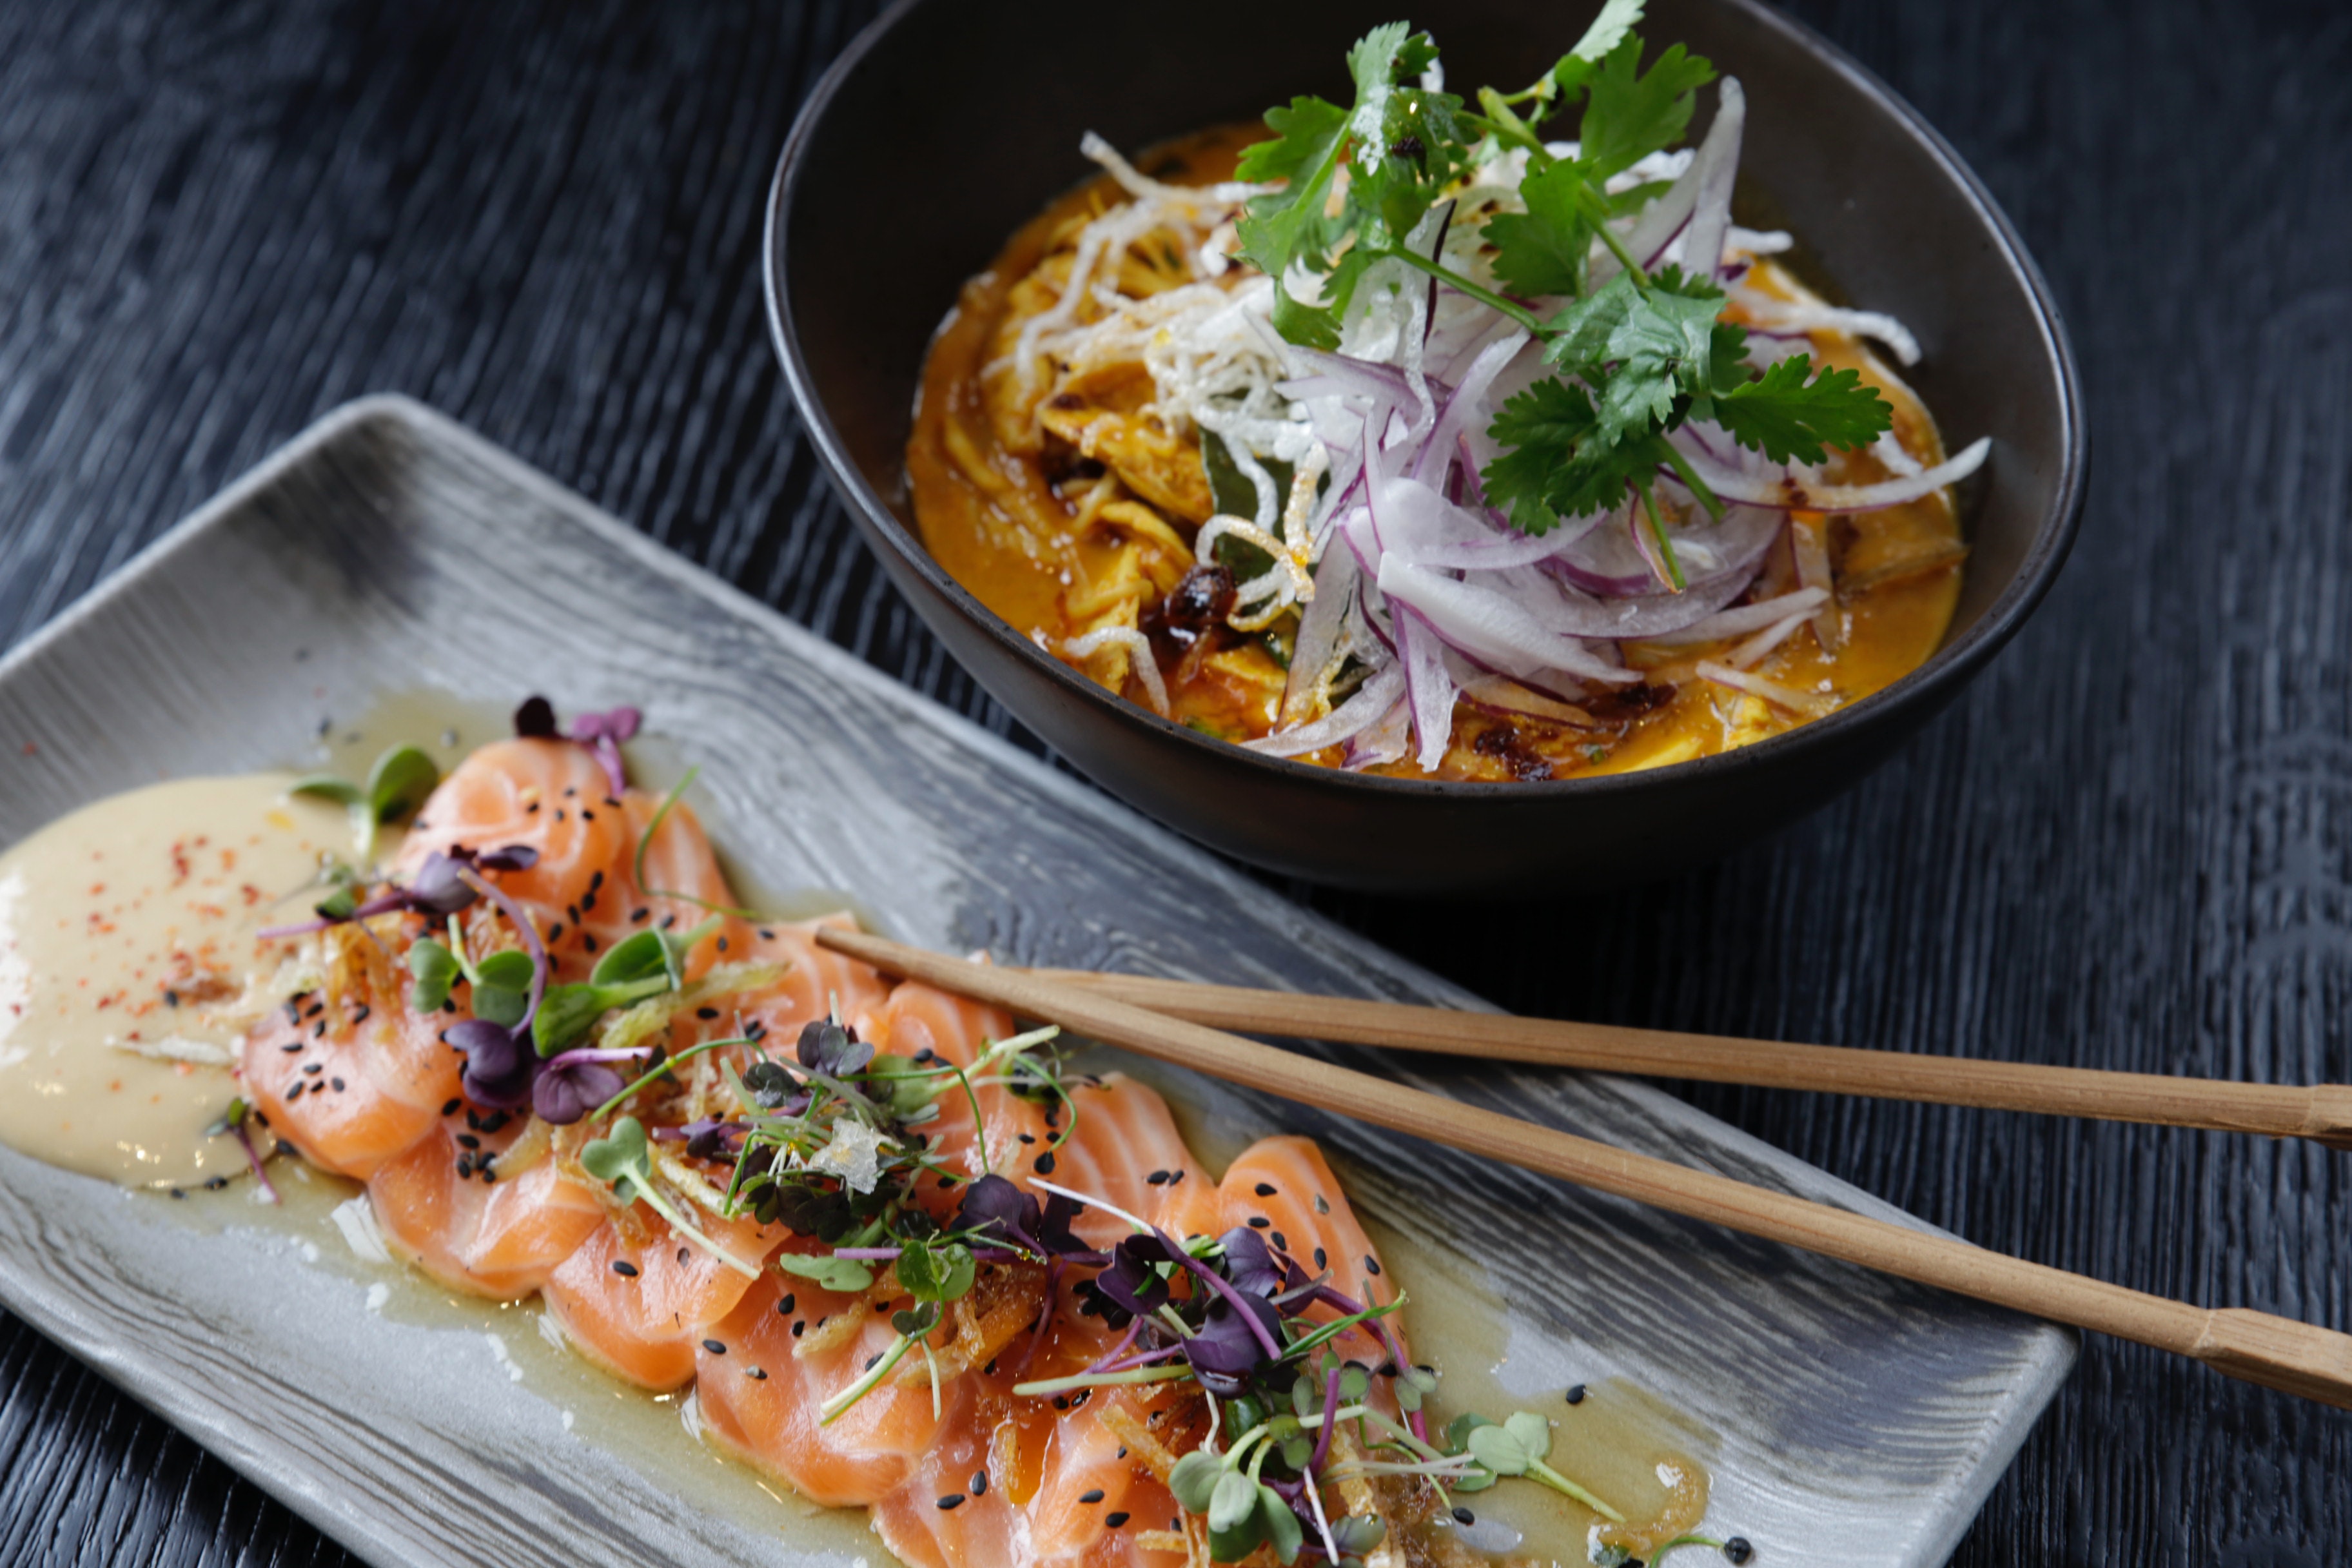
Photo by Christel Jensen from Pexels
Where to grow Microgreens?
If you're doing it for own consumption, Microgreens can be grown on shallow trays, pots, or even on a plate, in a cool rom or the kitchen . If you're going to grow it commercially, then you need to invest in some Professional Microgreens Trays, some shelving, possibly some lighting (if you don't have a greenhouse) and an automated irrigation or misting watering system.
The Basics of Growing Microgreens.
The two most popular watering methods for microgreens are:
- Spray or mist from above
- Watering from below via wicking effect (less likelihood of fungus accumulating on leaves and stems)
Most people growing micrgreens at home, or for own consumption, simply spray from above when it requires watering, so we will focus on method 1, but will also briefly explain method 2.
Step1 - Adding Grow media to the Microgreens Tray
Please note that its not always necessary to use soil or grow media when growing Microgreens. You can do it completely hydroponically (water only). If you're not using soil or grow media, its best to line the bottom of the tray with a porous geotextile mat or other material that will keep the seeds from moving around on the plastic tray, or from slipping down the drainage holes in the microgreens trays.
Our preferred grow media is cocopeat. Cocopeat retains moisture for longer, as well as retaining nutrients, and is a good wicking medium when watering from a bottom tray. Of course, one can also use other grow media such as Perlite, Vermiculite or Rockwool mats. Soil can also be used, but often not sterile and may affect the pH balance.
So for better spreading of the cocopeat, make sure it is fully hydrated. With the professional trays that we use (30mm deep x 50mm x 25mm) you would need around 1.5 litres of cocopeat.
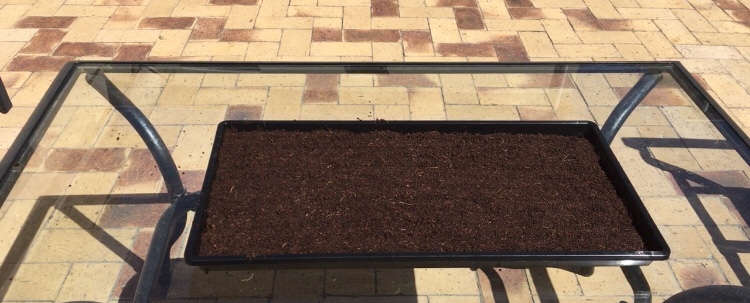
Spread evenly across the tray.
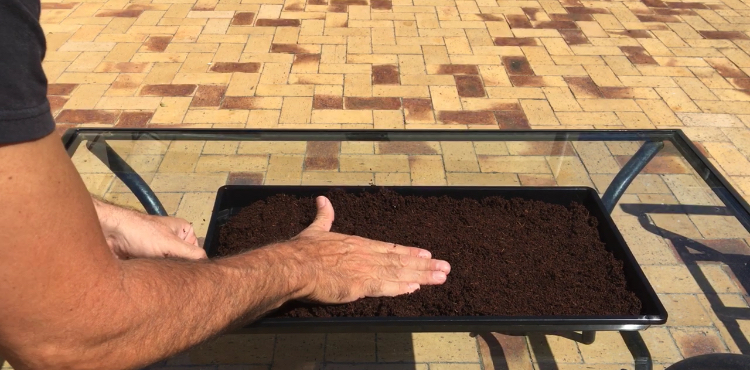
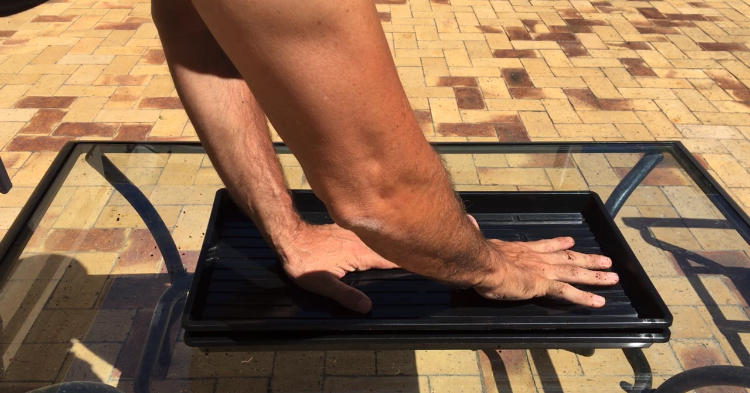
Once evenly spread, I like to use another tray to help compact the cocopeat further. As the Professional Microgreens trays have a recessed pattern at the bottom of the tray, it leaves nice indentations on the cocopeat for the seeds to settle nicely.
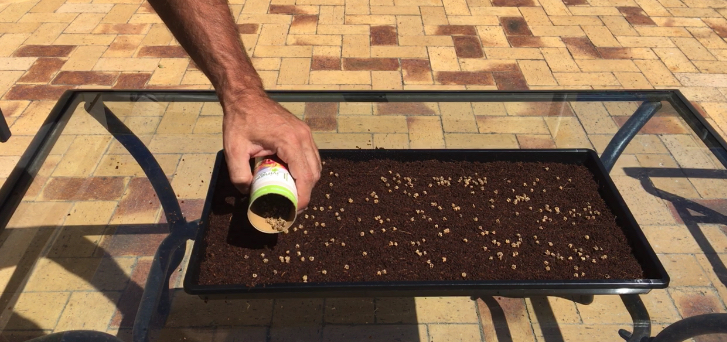
Step2 - Seeding & Germination
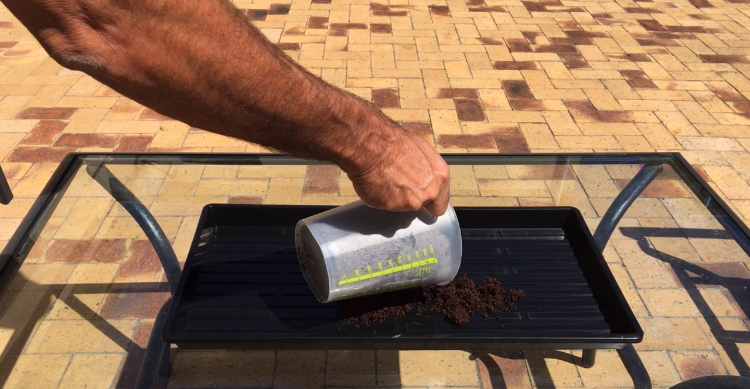
Your microgreens tray is now ready for the seeds to be added (sprinkled over the grow media). It is important that you always use fresh seeds with a high germination rate, or you may not get the results you're looking for. If 30% or more of your seeds don't germinate, you will not get a good harvest. Generally 40 grams of most seeds will give you a harvest of between 400 and 600 grams, depending when you harvest.
Also keep in mind that seeds come in different sizes and shapes. Bigger seeds like peas and sunflower should be left to soak overnight before being sprinkled or placed on the grow media. The idea is to sprinkle seeds in a uniform way all around the grow media on the microgreens trays. I've seen some templates with holes positioned evenly apart so that it populates the seeds in a perfect pattern, but that is not required. With time you will learn to spread the seeds evenly.

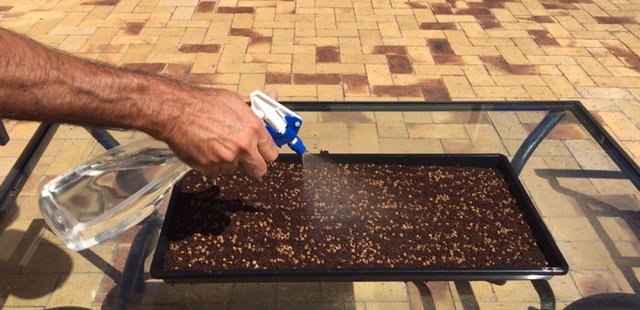
After the seeds have been we prefer pressing them into the grow media with another microgreens tray.
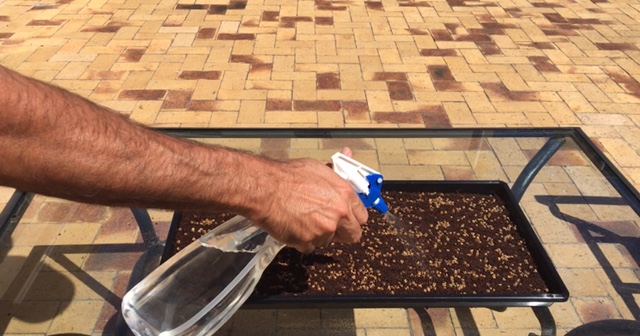
Seeds are now ready to be watered. Use a hand held spray bottle with a fine mist and spray all over, ensuring that the seeds are grow media are thoroughly soaked, but not water logged. You may use microgreens trays with holes to allow for any run off, but with the patterned recesses at the bottom of the professional trays we use, one does not really need to have holes at the bottom of the tray. The patterned recesses will hold some of the surplus water, which will be wicked up by the coco peat as the upper layers dry up. Use water with a pH of around 7. Most municipal tap water by law is at pH 7 or just over that. Allow tap water to sit in a container for at least 24 hours for the chlorine to dissipate.
Another alternative to watering microgreens is by using two microgreens tray. One slightly deeper than the other. The Professional Microgreens trays supplied by Myaquaponics are available in depths of 30mm (top tray) and 50mm (botto tray. The top tray would have drainage holes or slits at th bottom, whereas the bottom tray would have no holes. You would fill the bottom tray up to a level of around 25mm, than place the top tray on top so that the bottom is slightly submerged in water. The cocopeat grow media will then wick up the moisture via capillary action, ensuring that the microgreens are always well hydrated. No praying from above is required.
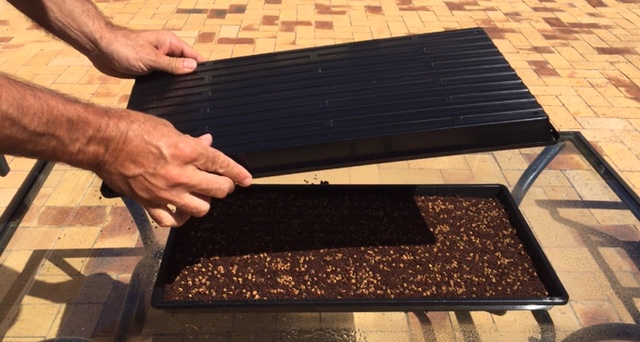
Generally, depending on the variety of the plants, seeds will germinate within a few hours to several days. During this period, its important to keep the seeds in darkness. We simply use another microgreens tray to cover the top during and 2-3 days after germination.
Keep checking the Microgreens tray for activity and grow media moisture content. Spray water as and when required making sure not to letting it flood the grow media.
Below are some Pak Choi microgreens germinating in less than 24 hours (by the way, the seeds you see in the steps above are not Pak Choi seeds, but Beetroot). Pak Choi seeds are much smaller (pin head size)
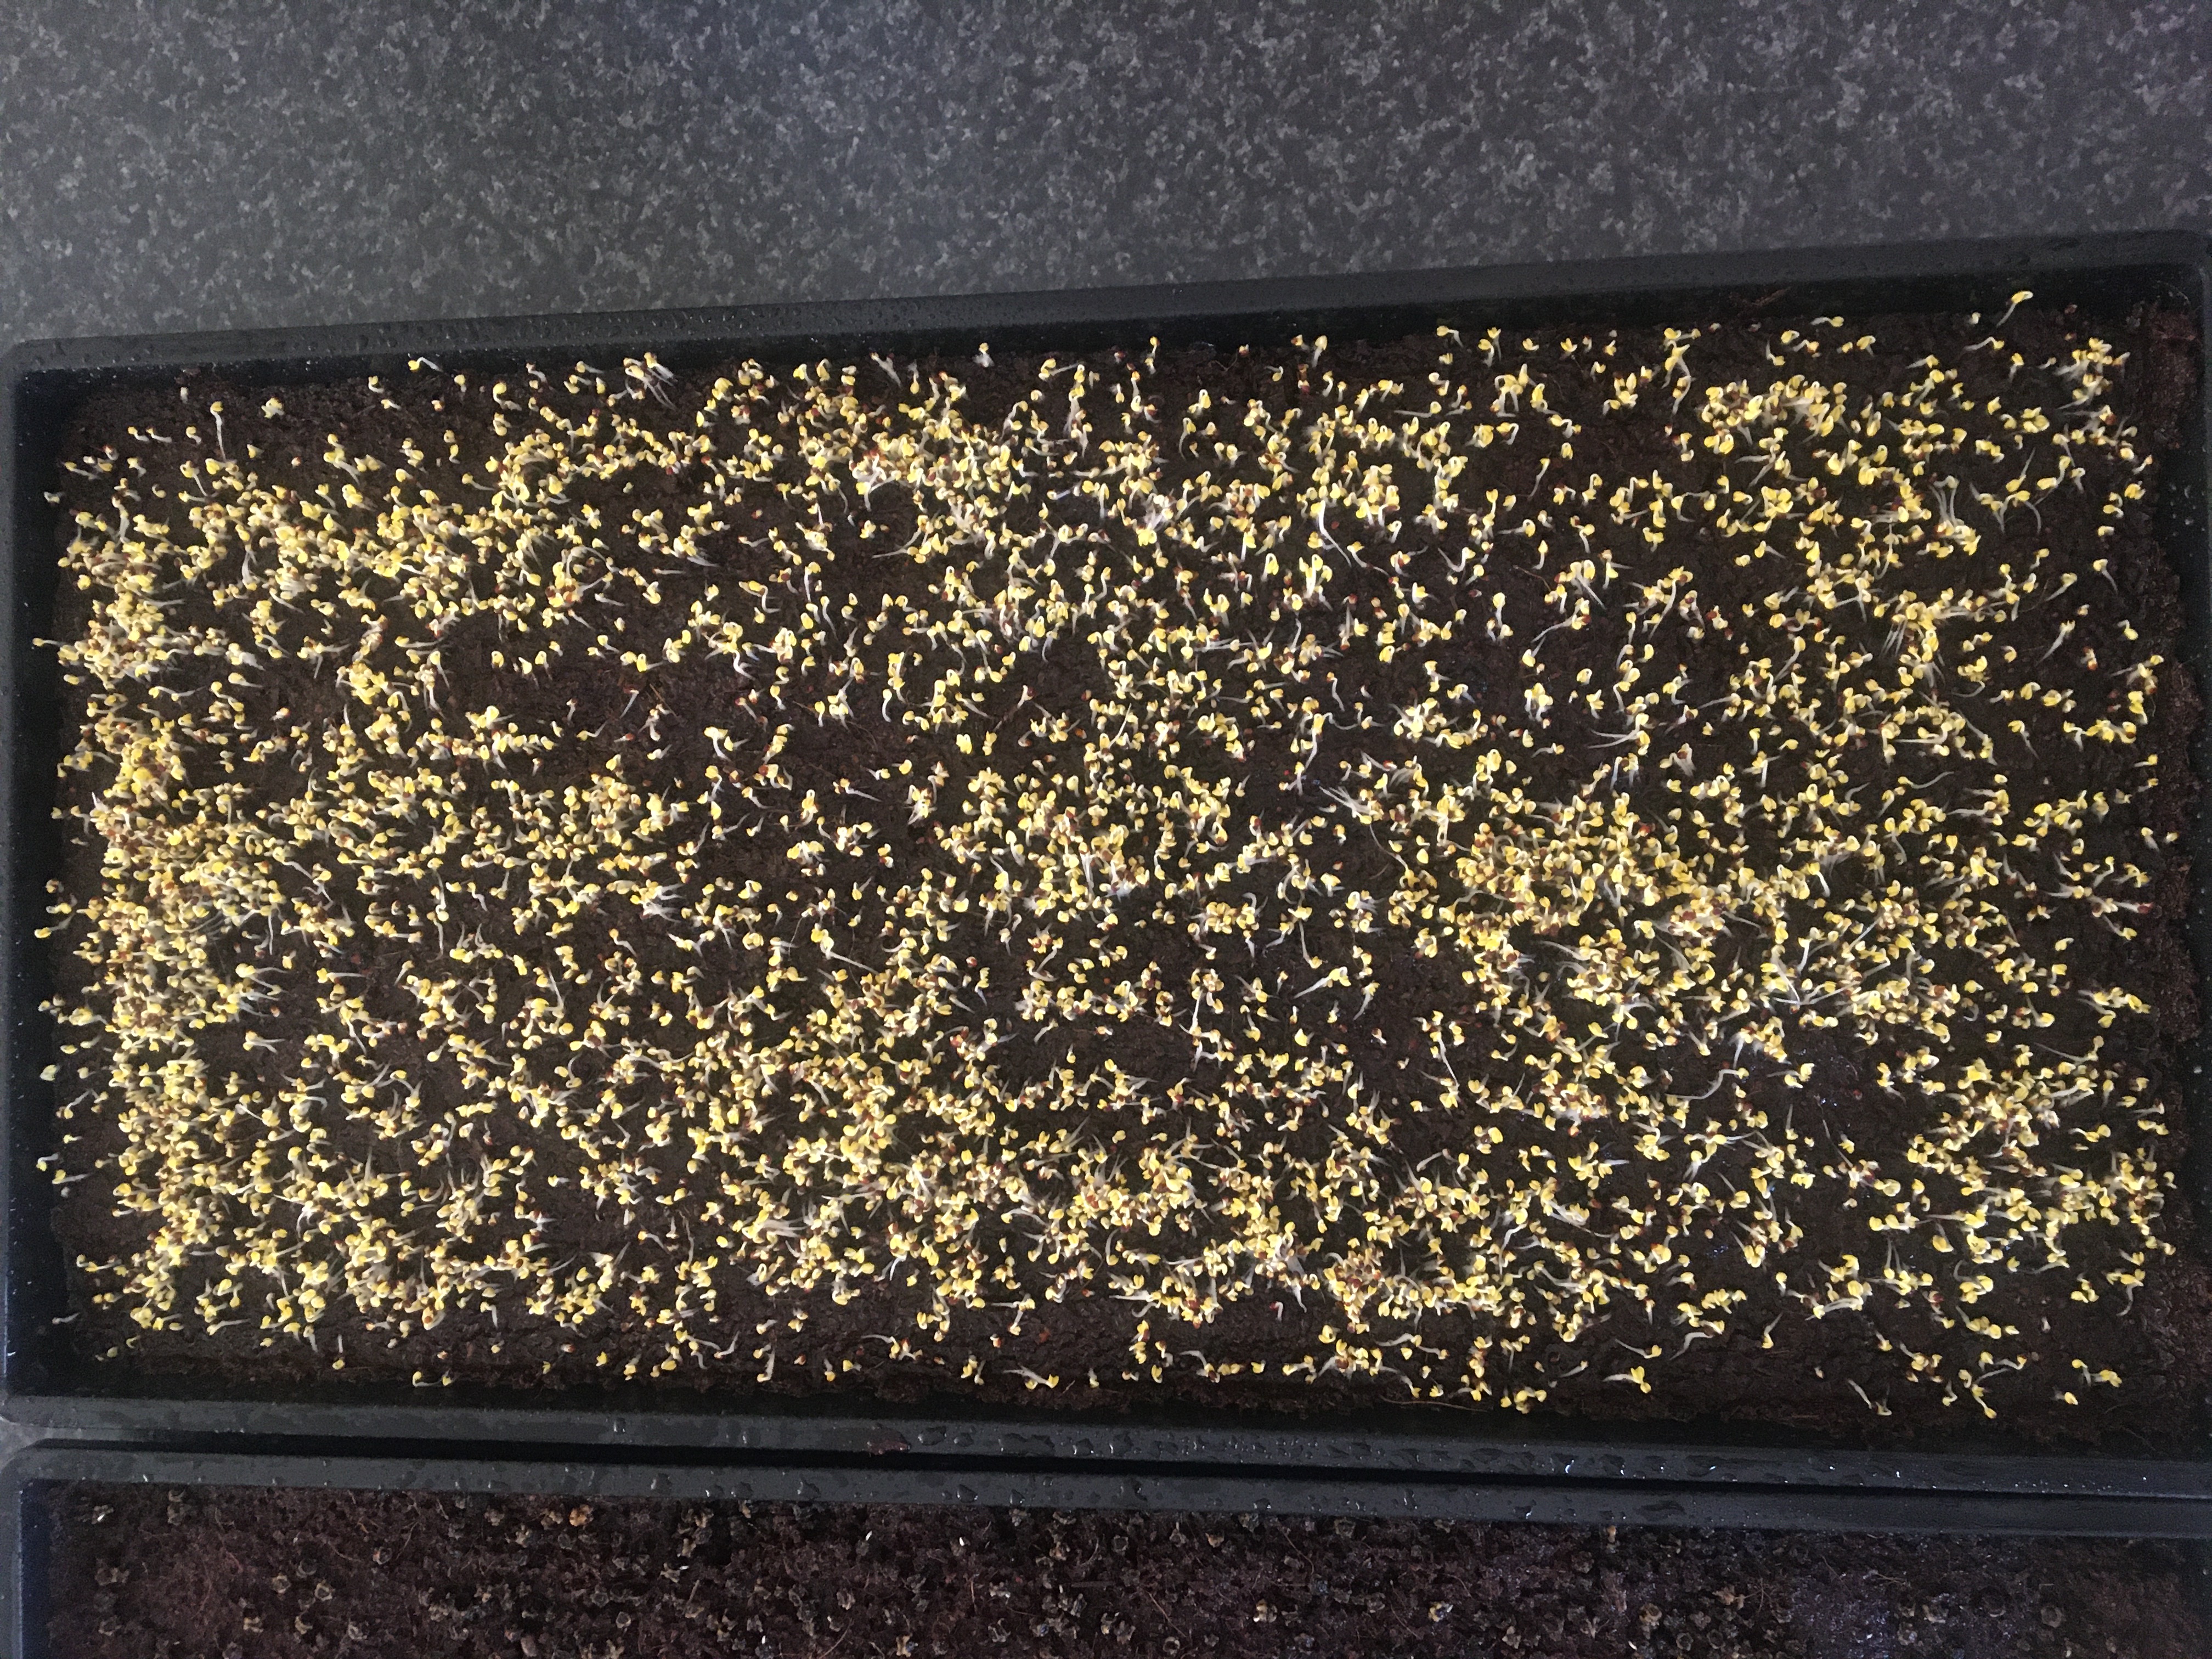
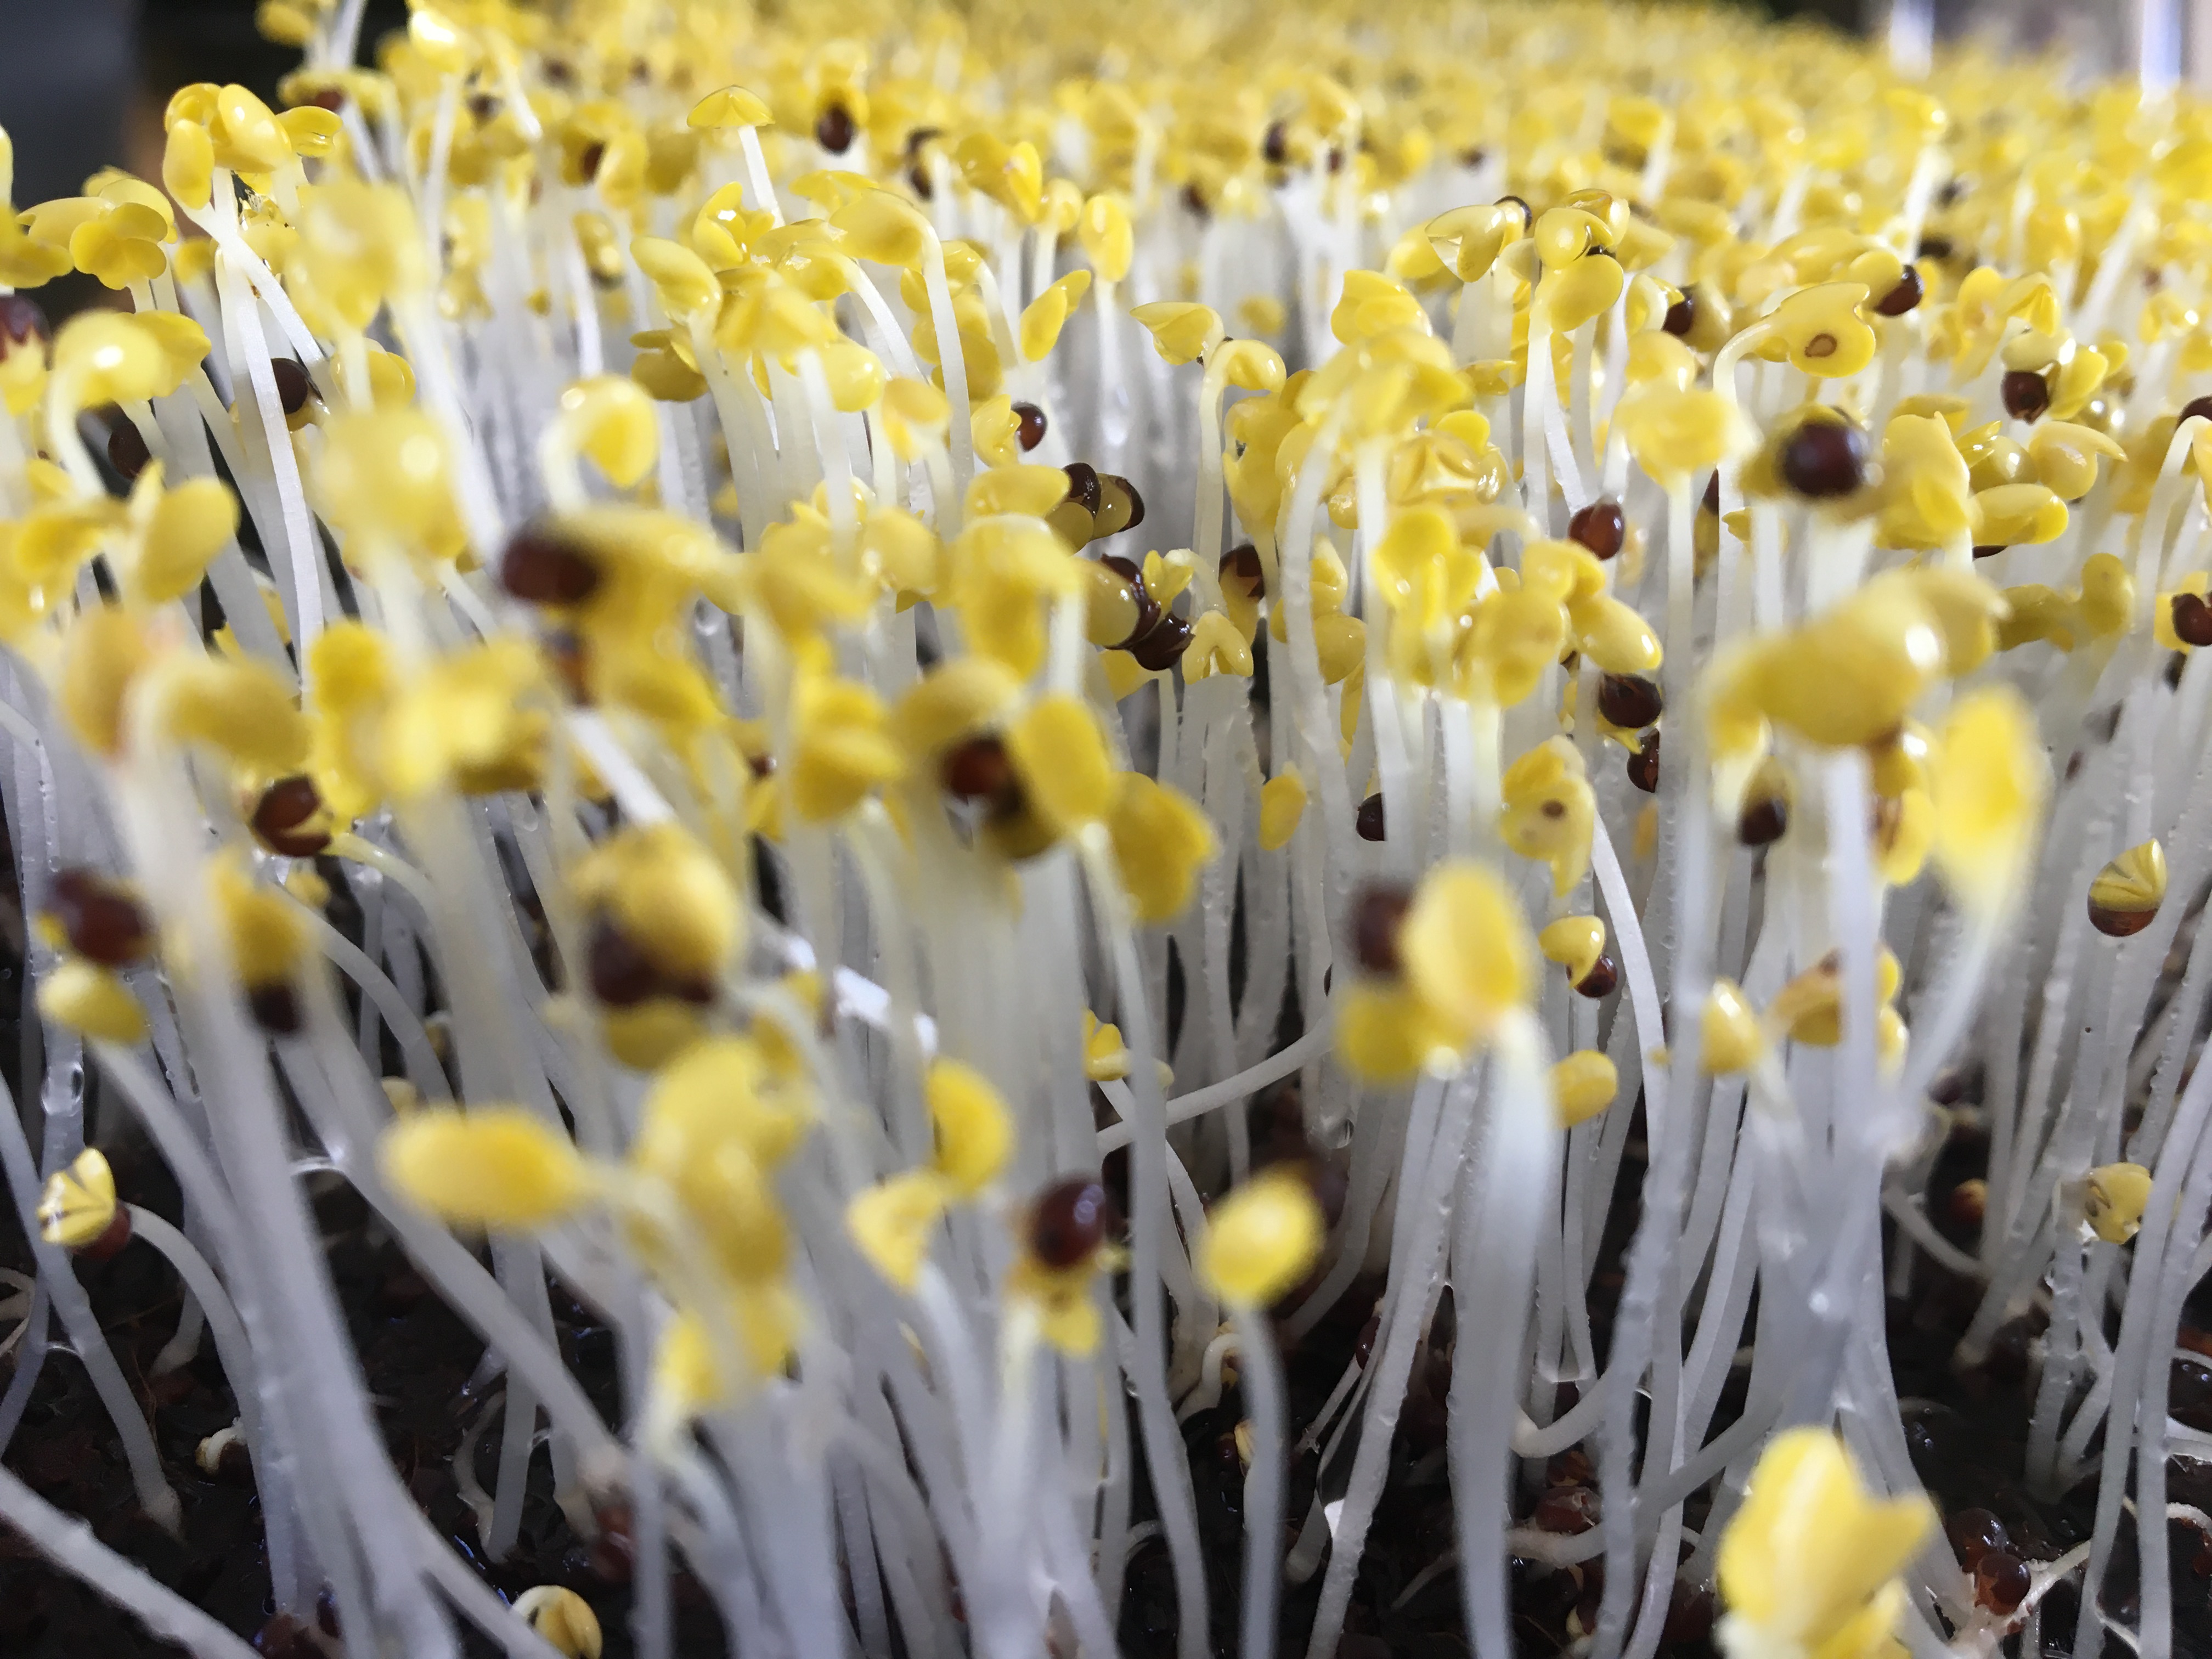
Two Days later and the growth is unbelievable while still under darkness (notice leaves are yellow)
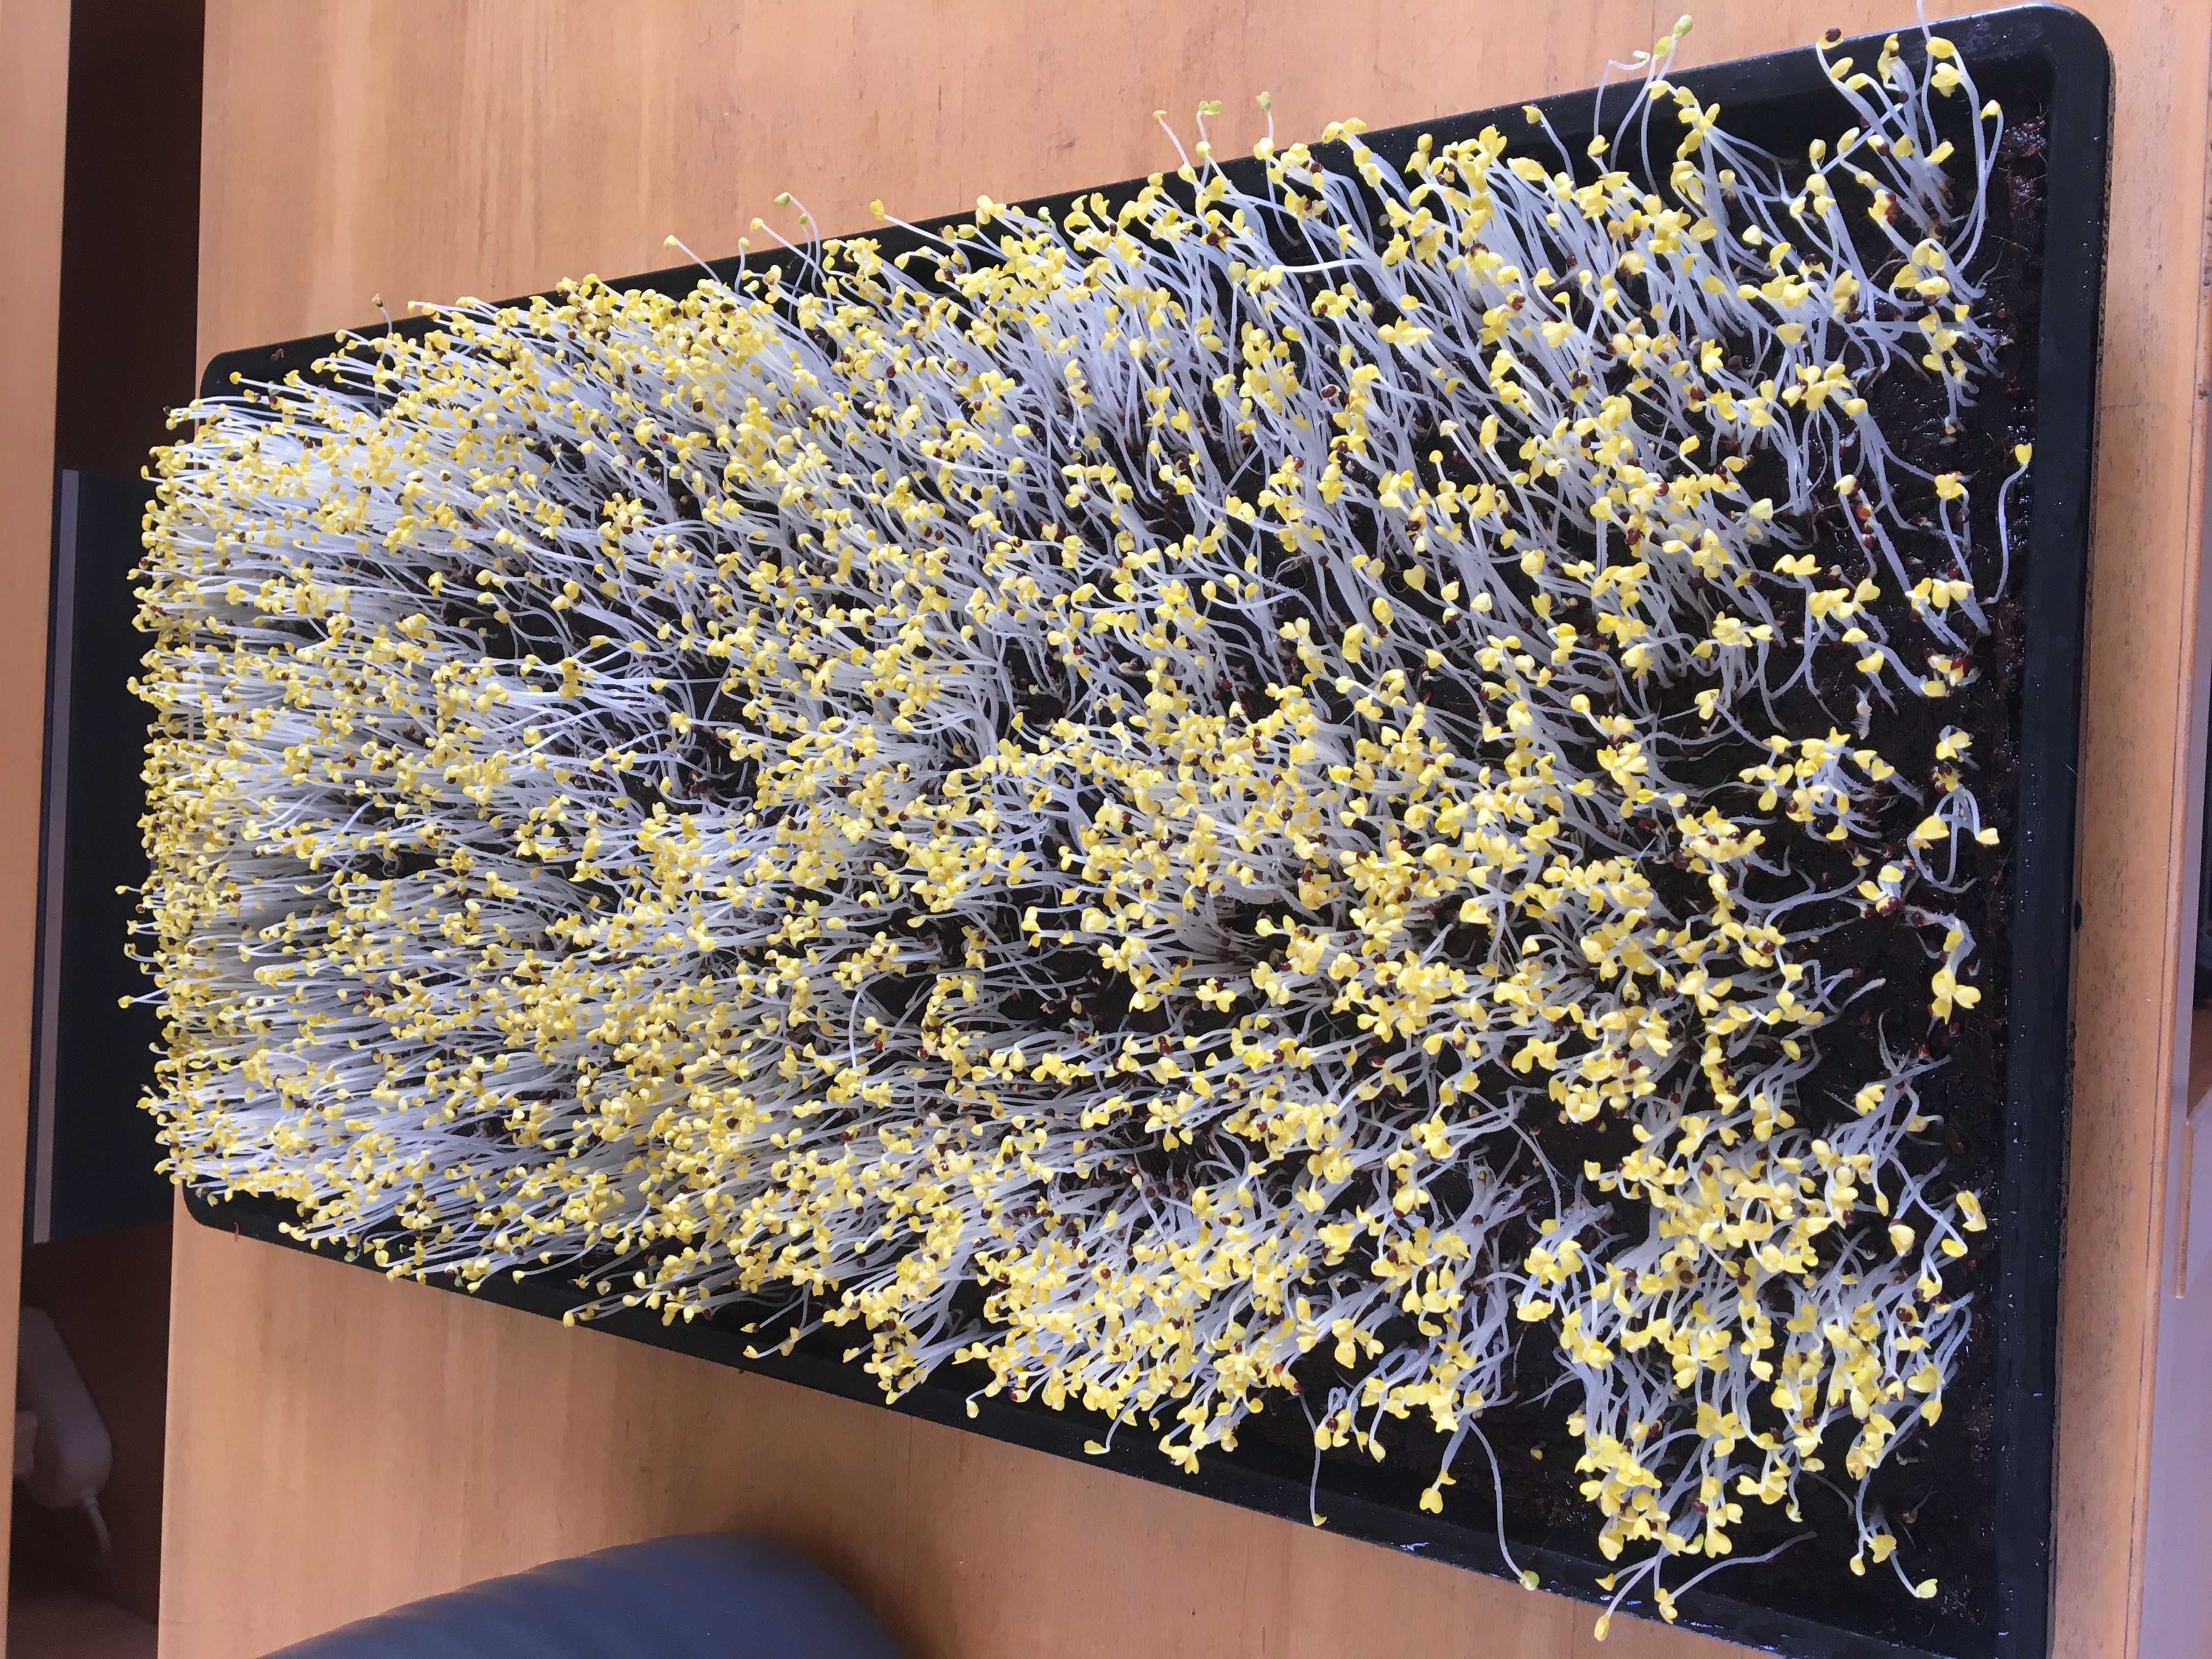
After the above stage, its time to introduce light. Do not immediately expose it to hot sunlight, but normal indoor lighting. Keep your microgreens in room temperature environment (21-23 Degrees C) for best results. LED lights, or the new type LED fluorescent tubes (Cool White - 2500 Lumen or more) is also a good low power light source for your microgreens. Ensure the room is well ventilated and keep watering your microgreens every few hours.

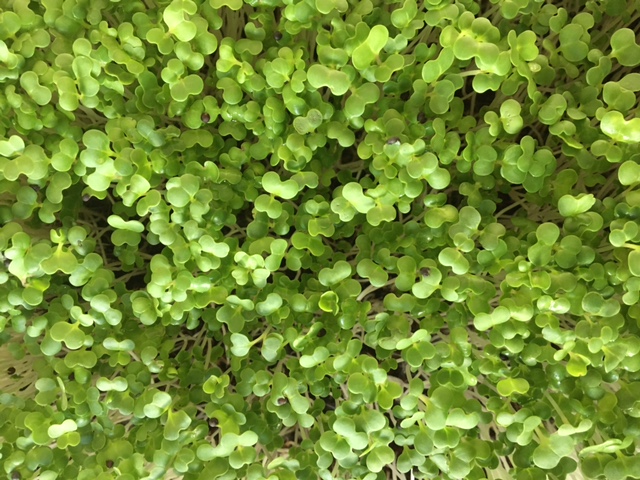
As you notice, leaves start turning green almost immediately after the introduction of light and will continue to get a darker green tinge with time.
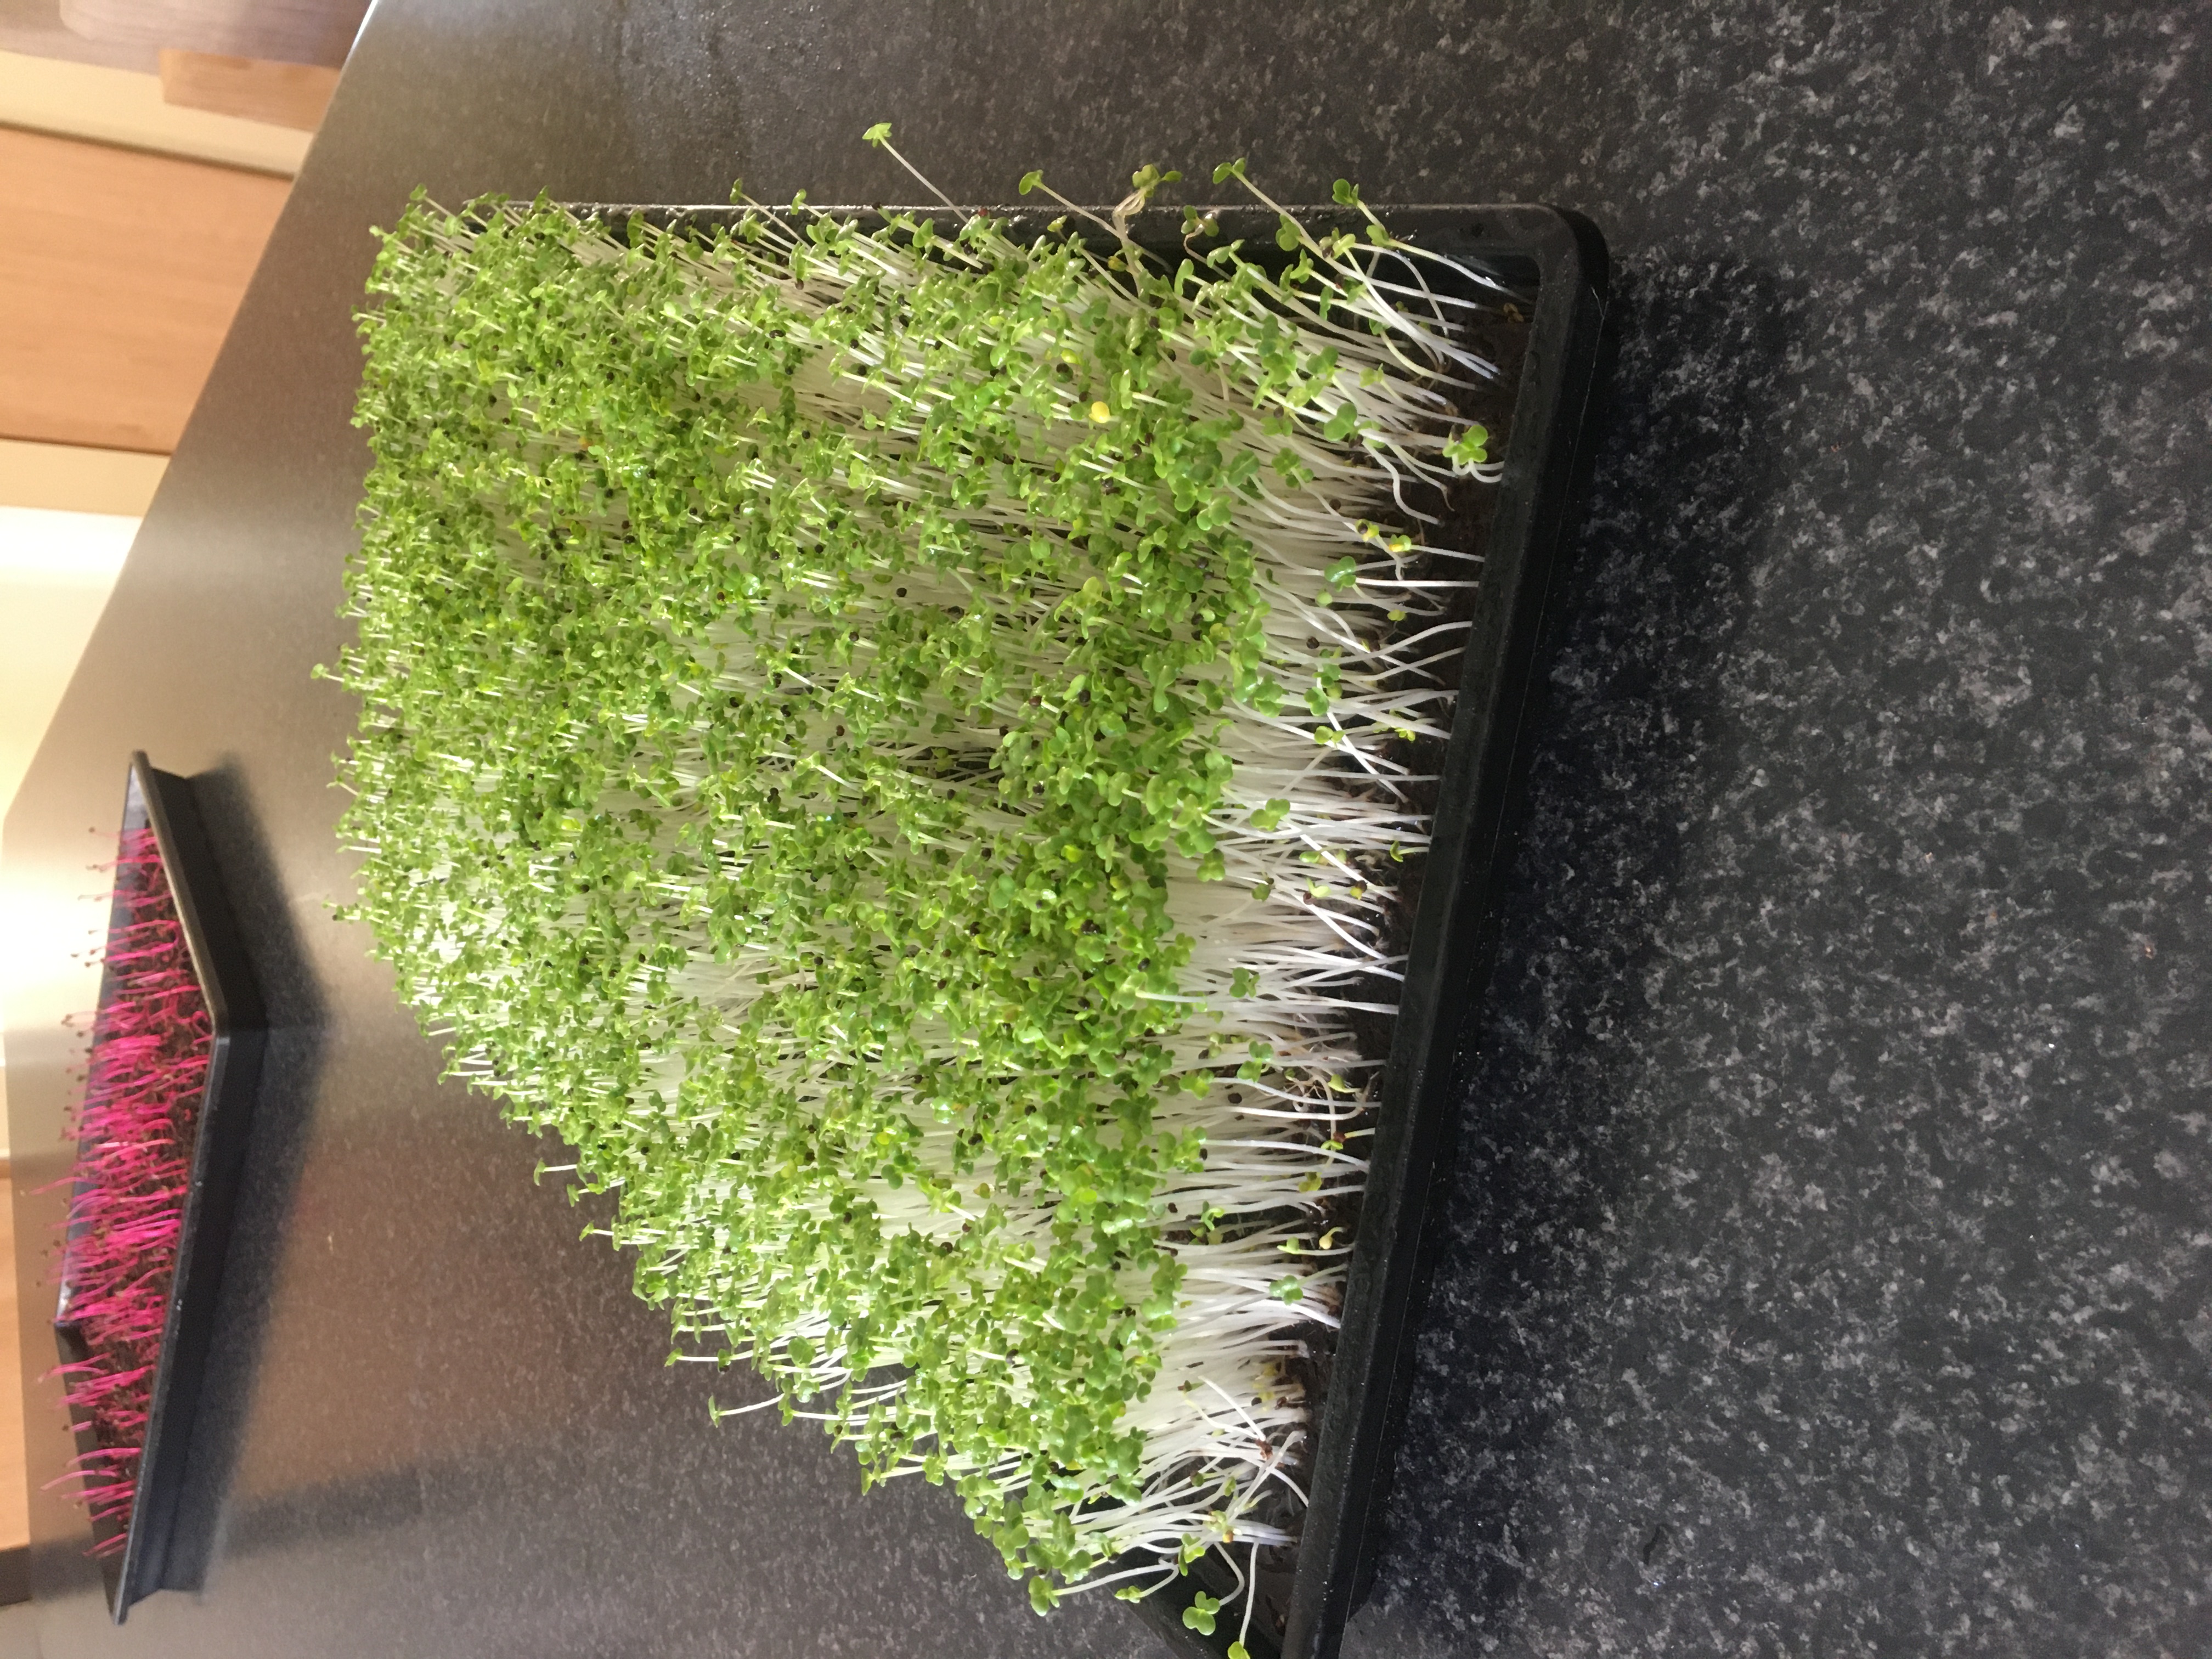
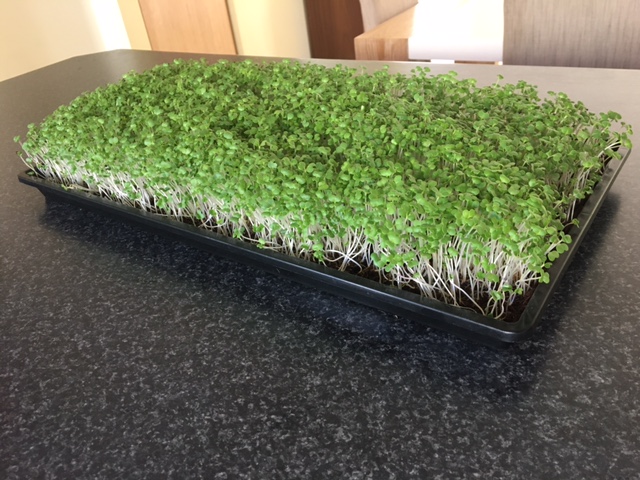
On Day 6, Pak Choi Microgreens have grown strong, filled up the canopy with more foliage and now ready to harvest an be eaten.
Step3 - Harvesting and Storage
Depending on the variety of plant you're going as microgreens, you can start harvesting anytime from 6 days onwards, up to 2 weeks, for best results.
You can use a scissors, sharp knife or blade to harvest your microgreens
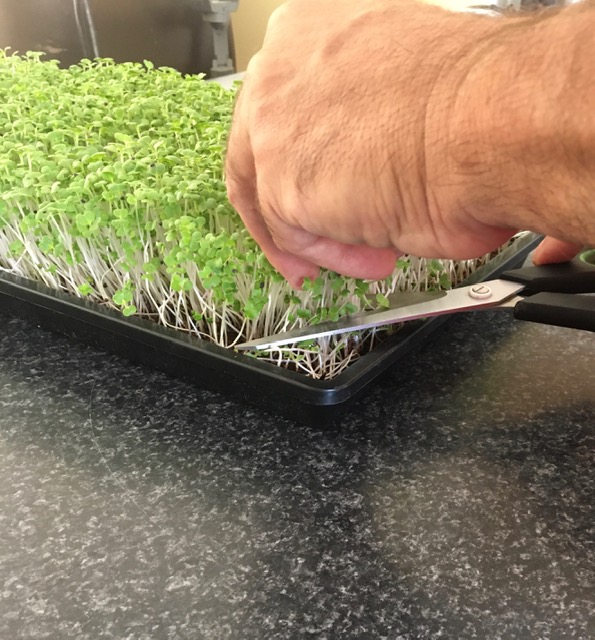
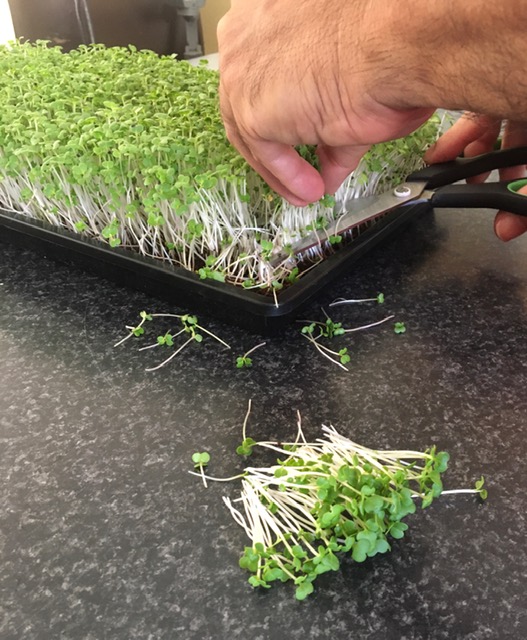
The importance of having a shallow tray of around 30mm comes in handy when harvesting, as you can cut just above the grow media, resulting in microgreens with a nice full stem (very little wastage).
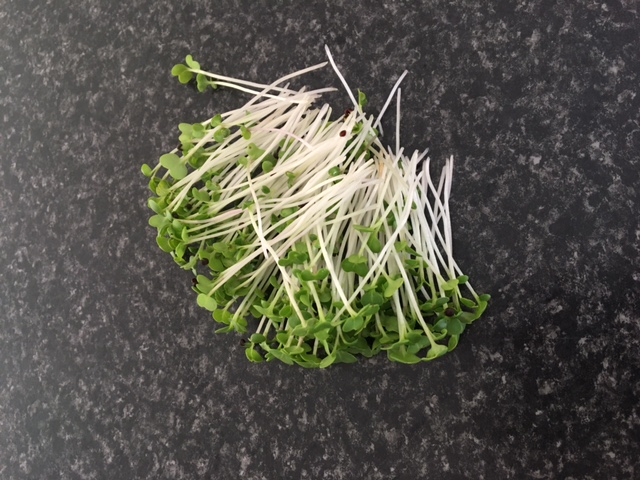
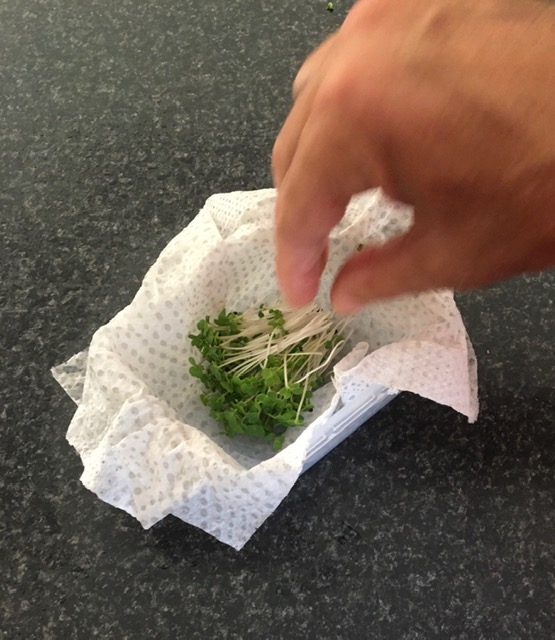
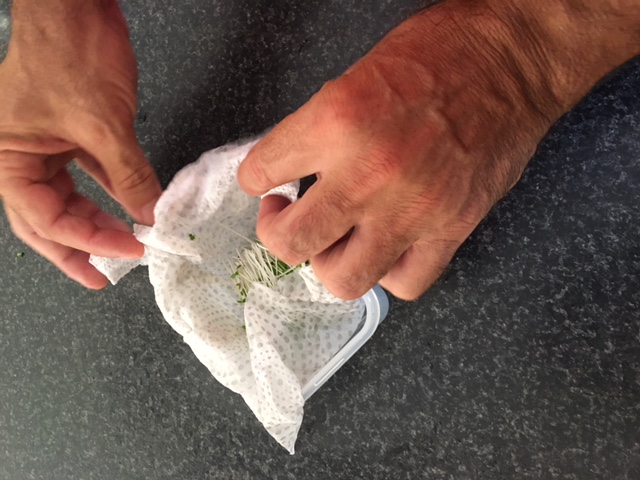
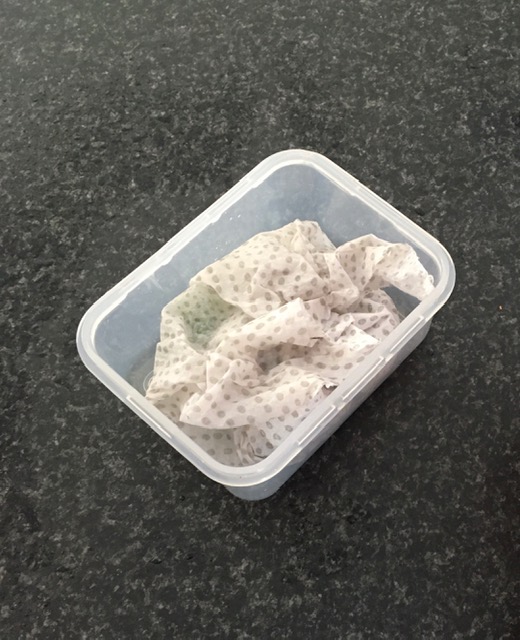
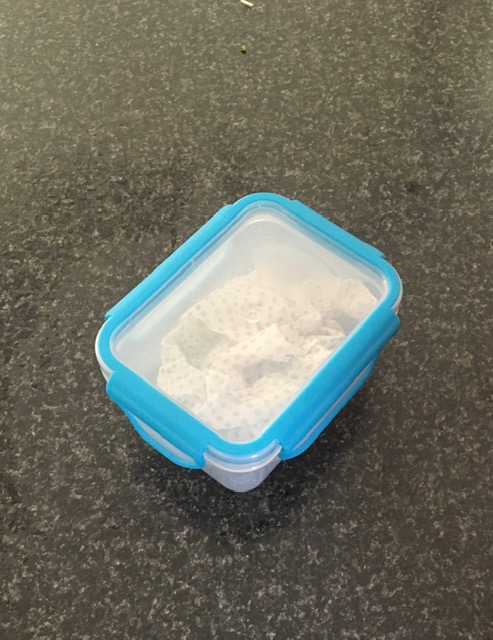
Once harvested its ready to be served at the table, as part of a salad or garnish. If you are not going to use it straight away, then put it in teh fridge for a few hours. For longer storage in a fridge up to a week or a little longer, prepare a plastic container and line it with a paper towel (non perfumed). Spray the paper towel until its damp and form it nicely on the inside of the plastic container.
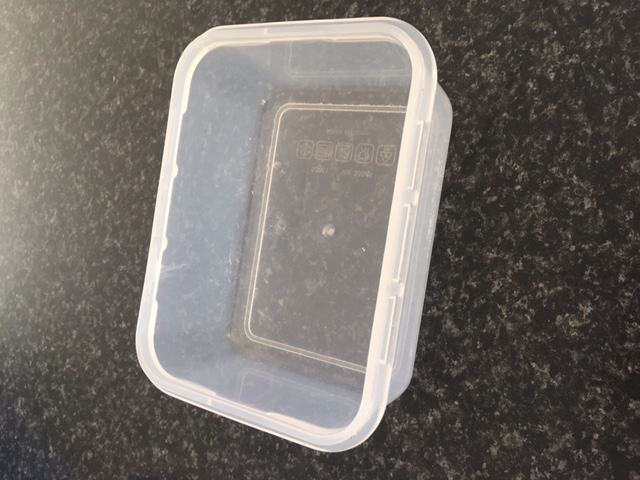
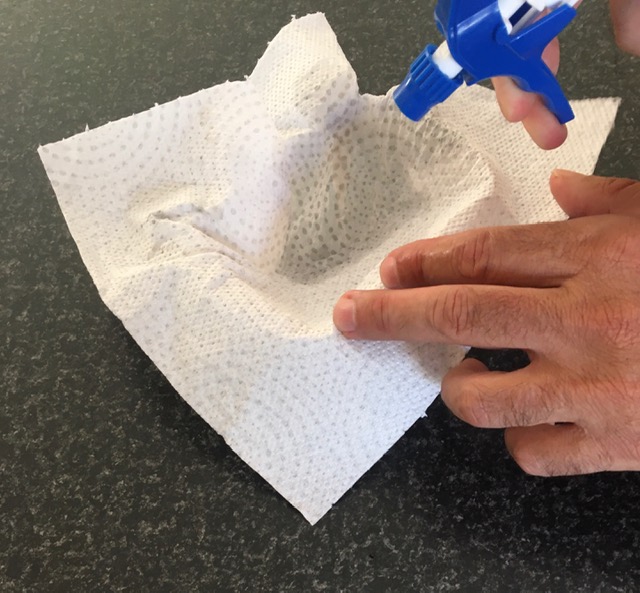
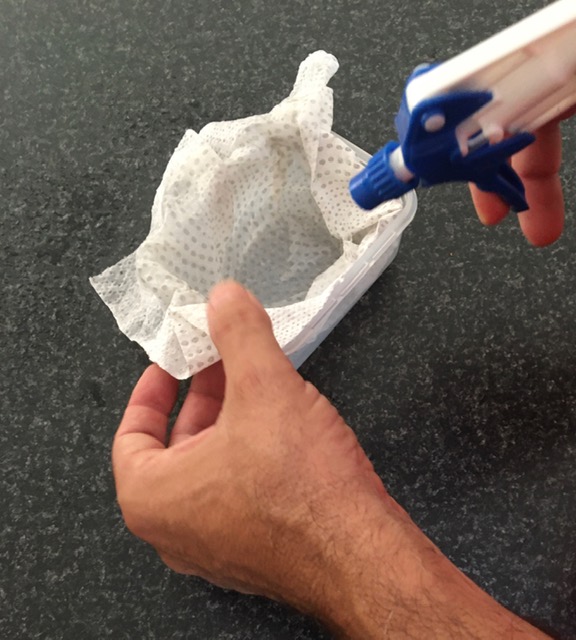
Place the freshly cut microgreens inside the container, fold the paper towel over it and give it one final spray before closing the lid and putting it in your fridge (do not freeze). Your microgreens should stay fresh and crispy for a week or longer.
.